Sunday, 10 November 2013

Raw Choc Chip Cookie Dough Balls

After the only half-successful cake I still decided to give the book Cake! 12 Healthy Recipes another try.

The No Bake Chocolate Chip Cookie Dough Bars have a method I am a bit more used to than yesterday's coconut flour cake. I did some adjustments but the little balls turn out really yummy.


Healthy nuts and seeds with natural sweetness are always a winner! The vanilla and the maple syrup give the recipe a distinctive flavor. And who can say no to dark lindt chocolate?

For variation one could roll the ball in coconut flakes or raw cacao powder.


Raw Choc Chip Cookie Dough Balls
(yields around 25 small balls)

Ingredients:

100g raw cashew nuts
50g raw sunflower seeds (without skin)
150g fresh medjool dates
2 tbsp maple syrup
1/2 tsp vanilla powder
1 pinch of salt
20g of dark chocolate (I used the one with 85% cocoa content)

Preparation:

1. Soak the cashews and the sunflower seeds in cold water for 2-3 hours and then drain.

2. Put all ingredients besides the dark chocolate into a food processor and process to a sticky paste.

3. Tip onto a plate and mix in the chocolate which you chopped into small pieces.

4. Roll the mixture into small balls with your heads and store in fridge to harden slightly.


Saturday, 9 November 2013

Coconut, Lime and Blueberry Cake

Are you as confused as me with all the health claims out there? Surrounded by the advocates for different lifestyles be it gluten-free, wheat-free, paleo or vegan to name just a few? Believers in intermittent fasting versus believers that leaving out breakfast will take you straight to hell on the nutrition highway?

Sometimes I am not sure if reading a lot is a blessing or if ignorance would be bliss. Over the last weeks I read lot's and lot's of books in the aim to find an eating plan suitable for me. Unfortunately with little success. Most books have convincing arguments. However if you compare notes in the end the arguments contradict. With some meal plans so constraining that I wonder where's the fun in live if one sticks to that?

I was hoping to find the easy way out by arranging for food intolerance testing in a lab. If there would not be all those published studies that those test results are not worth the paper they are printed on...

So I arrived at food intolerance testing through exclusion diet. This is based on the theory to exclude certain foods for a while from the diet in order to find out if changes in well-being can be detected.

But what's a baker without wheat, gluten and dairy?

Help was in sight with the recipe Coconut, Lime and Blueberry Cake from the book Cake! 12 Healthy Recipes.

Even though some of the ingredients are on the more unusual (and costly) side I was still keen on giving it a try. The recipe sounds easy enough. While preparing the batter some doubts start creeping up. This looks like nothing I baked before. Once all ingredients are mixed according to instructions I ended up with a result I would not call a batter but more a mix of weird crumbs. To be on a the safe side I added coconut milk to the recipe which resulted in some improvement in consistency but still more on the dry side.

The recipes requires the blueberries to be sprinkled on top. Due to the dryness of the cake batter that's also where they remain which I personally find a bit odd.

During baking the cake browned very quickly which made me a bit concerned about the baking time. Unfortunately the consistency of the batter did not allow for the usually poke test so I decided to stick to the 40 minutes mentioned in the recipe.

The taste test unfortunately confirms the dry appearance. The flavor is nicely coconutty which is complemented well by the fruity blueberries. The sweetness of the caramelly coconut sugar is balanced with the tangieness of the blueberries.

I will publish the recipe even though I don't consider it a success yet. Let's rather see it as a document of my learning journey...


Coconut, Lime and Blueberry Cake

Ingredients:
2 eggs
150g coconut sugar
150g grated courgettes
Juice and zest of two limes
100g coconut flour
100g desiccated cooconut
2 tsp baking powder
1/4 tsp salt
150ml coconut milk
150g blueberries

Preparation:
1. Preheat oven to 180 degrees.

2. Mix eggs and sugar well until foamy with an electric beater or mixer.

3. Add the rest of the ingredients besides the blueberries into the bowl and mix again until well combined.

4. Fill batter into prepared baking tin (with baking paper and greased sides) and sprinkle blueberries on top.

5. Bake for 40 minutes on a low level.


Sunday, 29 September 2013

Took a break...

... back soon. It's amazing how fast time is running sometimes! It's more than 4 weeks since my last blog. 4 weeks to overcome my cooking confusion spent in winter hibernation. After a doctor's visit I had to realize that I need to change the way I eat. That does not mean I didn't cook at all recently. But I spent more time figuring out what to eat in future then writing about what I ate.

However below a few pics from the last weeks. I will be back to blogging regularly soon!

Delicious filled aubergine:


Some kind of souffle-style fluffy bake made with asparagus and bacon:


Crunchy chickpeas roasted with Mediterranean spices:


Sweet and sour Lemon Meringue:


Asian-inspired fish ball soup with glass noodles:


Pearl Barley Risotto with feta:


Friday, 23 August 2013

Cravings for garlic bread

After checking out foodgawker.com while still lying in bed this morning I really felt like warm and buttery garlic bread.

I still had leftover dough from the pita breads earlier this week so I decided to form this dough into small rolls and slather the rolls with garlicky butter. So delicious!


You can find the recipe for the dough here. The garlic butter is just salted butter mixed with crushed garlic. However I always crush the garlic myself. I find that the one you buy crushed already develops are very strong side taste I don't enjoy.

Homegrown Sprouts

Have you ever grown your own sprouts at home? It's super easy and so much fun. Also something cool to do with the kids. You just need a plastic container for sprouting (Wellness Warehouse for example sells them), some seeds and water. Within a few days you will be ready to eat your first fresh sprouts. Yummy in salads but also very good on a simple slice of buttered bread with a little bit of salt. Besides that sprouts look pretty when decorating plates and they super healthy because they super fresh when you eat them and there's no pesticides if you grown them yourselves. I added a few pictures to describe the process of growing sprouts.

The seeds need to be soaked over night in water. Once they in the sprouting container just pour water into the top layer twice a day. Be careful to empty the bottom layer regularly where the water collects. Depending on the kind of seed you are using it will take 3-7 days until you can harvest. I used broccoli and alfalfa seeds on the pictures below. The alfalfa grew much quicker.


The salad is an adaption from the recipe California Sprout Salad in the book Jamie's America. Thrown together in less than 10 minutes and wholesome enough to make up dinner together with some nice bread.

Salad with Sprouts, Chickpeas and Chorizo

Ingredients for 4 portions:

200g mixed shoots and sprouts
150g sugar peas, cleaned and cut in pieces
1 fresh red chilli, finely chopped
100g rocket leaves
4 tablespoons of balsamic vinegar
4 tablespoons of extra virgin olive oil
1 tablespoon olive oil
150g chorizo sausage, sliced
200g cooked chickpeas
2 cloves of garlic, peeled and crushed
salt and black pepper

Preparation:

1. Mix the shoots, sprouts, sugar peas, chilli and rocket in a bowl and dress with the balsamic vinegar and the extra virgin olive oil.

2. Heat the tablesoon of olive oil in a pan and fry chorizo, chickpeas and garlic in the oil until slightly browned.

3. Dish the salad mix from the bowl onto individual plates, add the chorizo mix on top and add salt and pepper according to taste to each plate.


Tomato-Bulgur-Soup with Chickpeas

I am still alone at home so there are still more chickpeas to be used up in the fridge. And my guess is there is still more chickpea recipes to come.

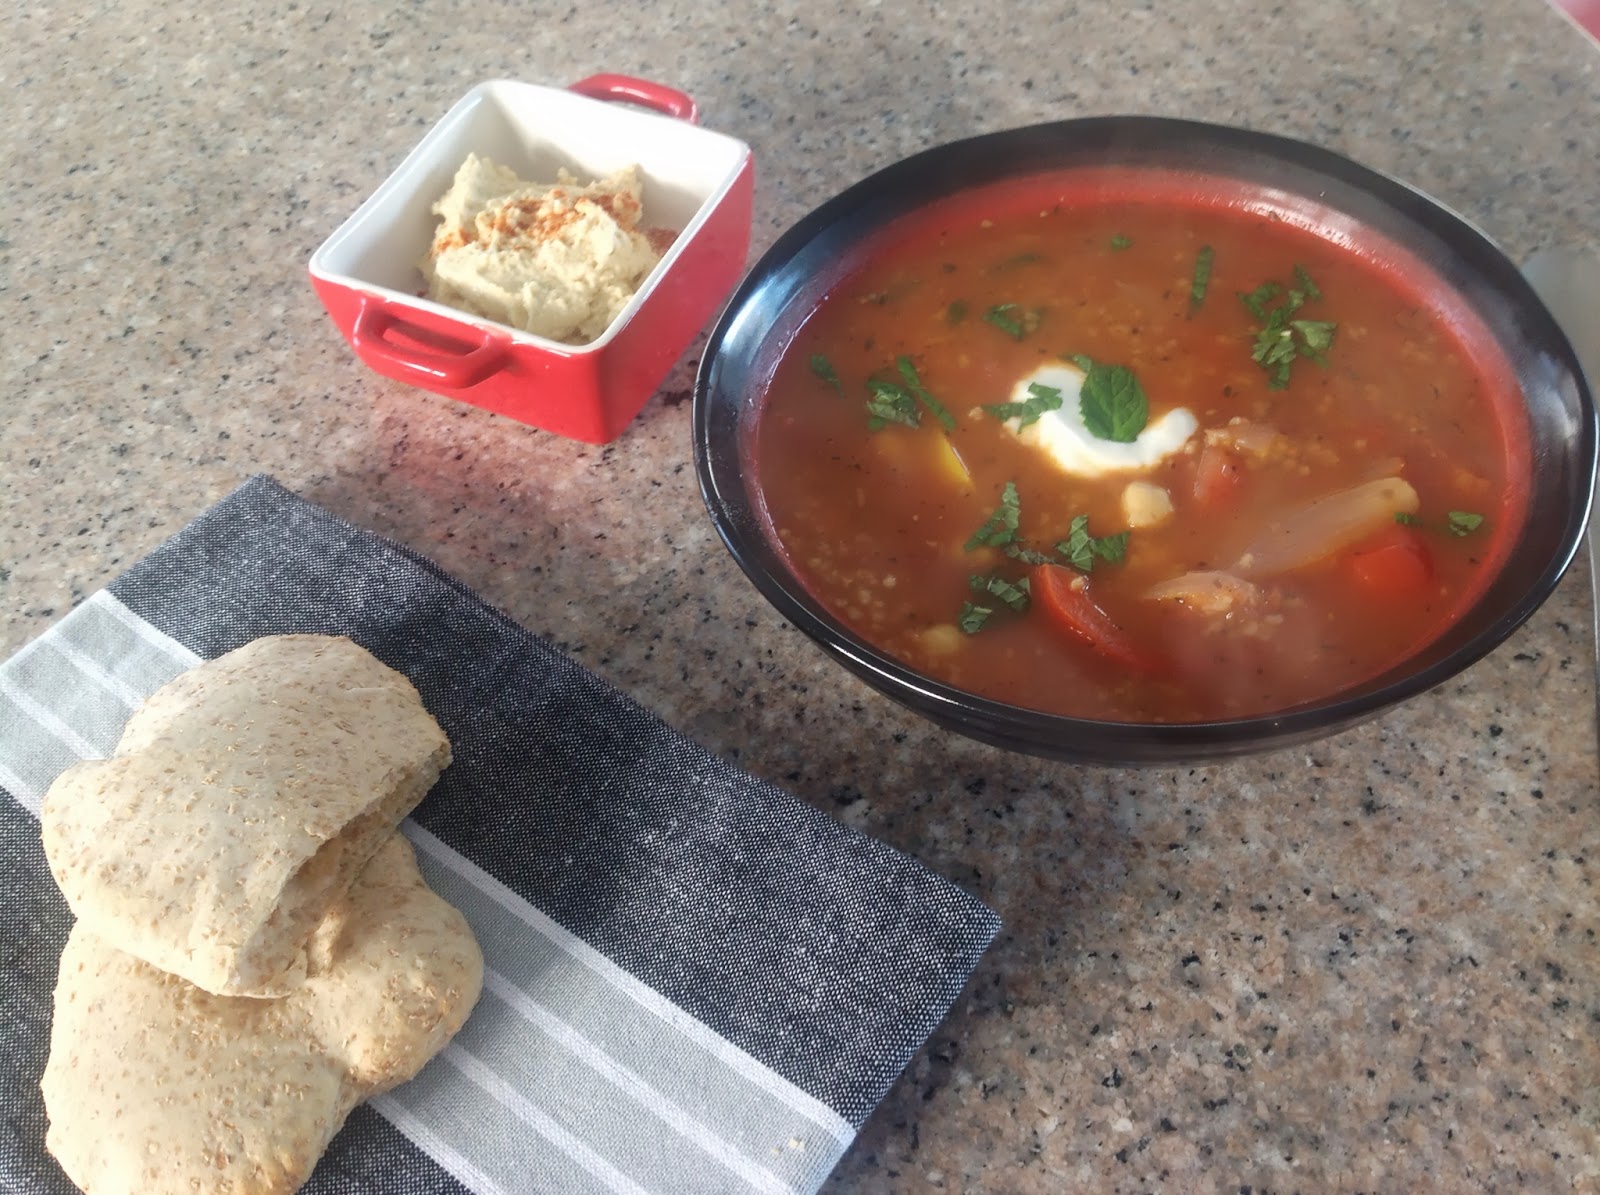
In the meantime I made this yummy soup to fight the winter chill in Cape Town. I still had pita bread dough so I baked some more to accompany the soup and ate some hummus with it.


The following recipe is adapted from the recipe My Astoria Soup from Jamie Oliver's book Jamie's America.

Tomato-Bulgur-Soup with Chickpeas

Ingredients for 4 portions:

100g bulgur wheat
200g cooked chickpeas
1 red onion, sliced
1 yellow pepper, deseeded and sliced
1 red pepper, deseeded and sliced
4 cloves of garlic, chopped
olive oil
3 tablespoons zahtar
1 teaspoon cumin
1 teaspoon smoked paprika
1 tin (400g) chopped tomatoes
1 litre chicken stock
15 cherry tomatoes, halfed
grated rind and juice from 1/2 lemon
mint leaves, chopped
salt and black pepper
optional: plain yoghurt

Preparation:

1. Prepare the bulgur according to the instructions on the package. (Usually one just has to add boiling water and wait until it is soaked up)

2. Heat the olive oil in a decent sized pot and once hot fry the onion and the peppers in the oil for about 3 minutes. Add the garlic, zahtar, cumin and smoked paprika. Fry for another minute and add the chopped tomatoes with the stock. Boil for ca. 15 minutes.

3. Use a stick blender to blend some of the chunks in the soup but not all of them. Add the bulgur, chickpeas, cherry tomatoes, lemon rind and lemon juice and bring to almost boiling point again. I like to add a spoon of plain yoghurt to each portion.

4. Add the chopped mint, season with salt and pepper according to taste and serve hot.


Tuesday, 20 August 2013

Lebanese Breakfast

I had a lazy late morning today. There's still chickpeas left from yesterdays dinner and I really felt like fresh, homemade bread. So hummus with pita bread it was.

The recipe for pita is adapted from the book The Lebanese Kitchen. The hummus is done the way I am doing it for years with slight variations. To make it less fatty I add some yoghurt to reduce the olive oil. However you can replace the yoghurt with oil to keep it more traditional. The recipe makes quite a decent amount which keeps well in the fridge.

The pita turned out delicious. It puffed up perfectly with crunchy and soft bits.


Hummus

Ingredients:

250g dried chickpeas, soaked in cold water overnights
4 tablespoons of olive oil
2 tablespoons of chilli-flavored avocado oil
3 tablespoons of tahini
3 tablespoons of plain yoghurt
2 cloves of garlic, minced
Salt
Extra olive oil

Preparation:

1. Boil the chickpeas in fresh water for ca. 60 minutes until tender. Drain and let cool down.

2. Add the chickpeas with the rest of the ingredients to the food processor and process until you get an even dip.

3.Check if there's enough salt in it and serve with olive oil drizzled on top.


Whole Wheat Pita Breads

Ingredients:

500g whole wheat bread flour
1 package dry yeast
1 teaspoon salt
2 tablespoons of olive oil
325ml warm water

1. Mix the flour, yeast and salt in a bowl. Add the olive oil and the water and knead the dough for at least 10 minutes until thoroughly mixed and elastic. Add some more water if the dough is too dry or some flour if too sticky.

2. Let the dough bloom in a fresh bowl covered with a kitchen towel. After 1 hour the dough should have more than doubled it's size.

3. Take golfball sized pieces of the dough and roll out flat in round shapes.

4. Bake at 230 degrees in the preheated oven for 10-15 minutes until lightly browned.